Blue Hour/ Golden Hour and Photography
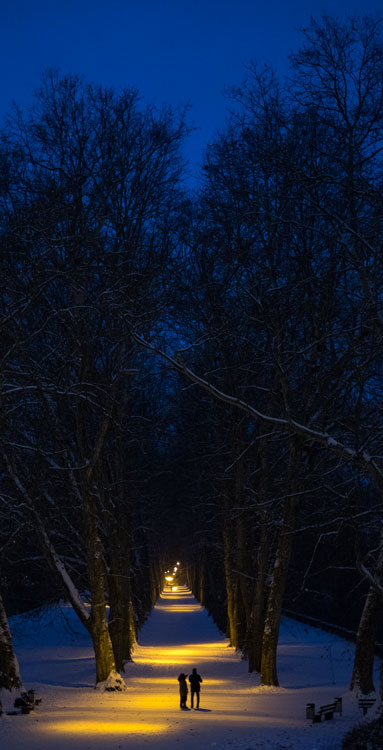
A special charm for taking photos has the blue hour - whereas hour is relative. In photography, we also speak about the golden hour. So, let us take a look what the blue hour is at all. This term describes the period of time (which is not really an exact hour!) of dawn and dusk. The sky becomes deep blue with roughly the same brightness of an artifical illumination. Now, especially delightful pictures are possible.
Colors of the blue hour

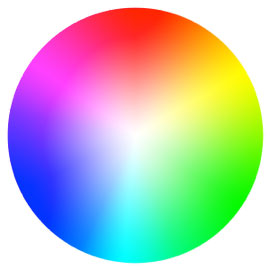
It is very interesting for the blue hour to take a look at the color wheel. With its blue we have a cold color. Often an orange-yellow will appear because of lights and buildings - a warm coolor. These colors are located in the color wheel in the opposite of blue. Thus, we have a combination of complementary colors. Complementary colors can support each other and thereby seem harmonious.
A limitation of its harmonious effect: When color fields with complementary colors hardly clash a overstimulation of the photoreceptor cells of our eyes occurs - this problem in general doesn't occur in photography.
Duration of the blue hour
The duration depends on your position on the world. The differences are astonishing when beeing near the equator or in Europe or close to the North Cape. Near the equator the duration is extremly short and it is irritating when an European experience it for the first time. Around the summer solstice (around the 21 of june) middle europe has up to 50 minutes and the closer you move to the poles the longer the duration is.
If you want or need exact times for a date, then The Photographer`s Ephemeris (TPE) as an online app can help a lot: http://app.photoephemeris.com/, it is also useable as an app with the same name for your smartphone.
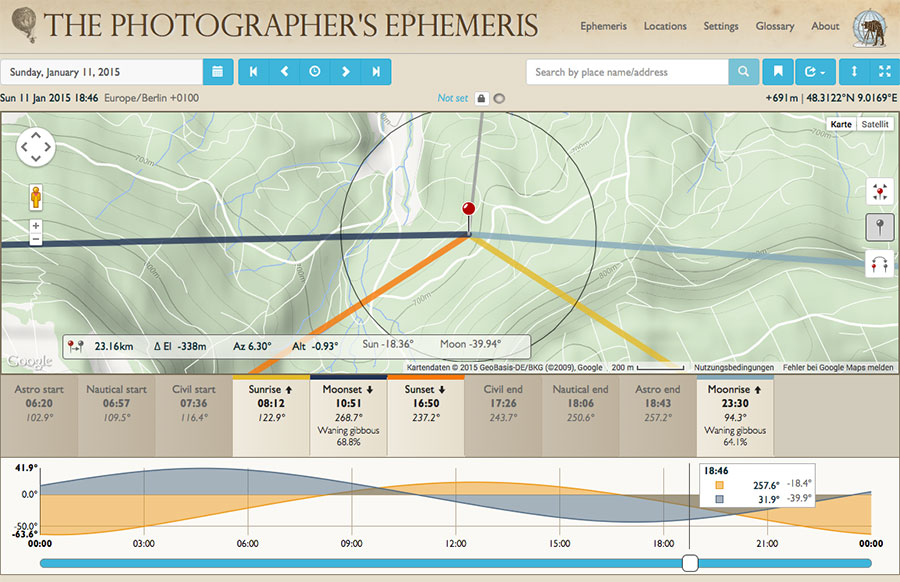
Push the second button furthest to the right in the online app and you will get all the relevant data shown on the map below (for that take care that you have not activated the large view with the button on the furthest to the right!).
Below the map you can now see all the relevant data about your position and the chosen date.

Example for duration and start of the blue hour on a certain date
For dawn (twilight) there are 3 different times for 3 different dawns: civic, nautical and astronomical. For us only the civic dawn is relevant.
In the example above sunrise should be happening at 07:36 and dawn should last till 08:12. In the evening the sunset should start at 16:50 and end around 17:26.
Another possible tool is the Twilight Calculator from Jens Koßmagk, which you can find at: http://jekophoto.eu/tools/twilight-calculator-blue-hour-golden-hour/
Physical Cause
For physically interested: The blue in the sky in the evening has a different spectral consistency then at day, because this deep blue is caused through the existence of the ozon layer and the flat angle, which the light has at that time - this was discovered by the geophysicist Edwar Hulburt 1952.
The sun has midday a color temperature of 5500 kelvin.
The light has a color temperature in the blue hour between 9000 and 12000 kelvin.
During the day the sky looks blue because of the Rayleigh Scattering (named after the physicist John William Strutt, 3. Baron Rayleigh) of the sunlight at the molecules of the terrestrial atmosphere.
Now, if we observe the sun's path, we can notize that both effects mix and distinct color temperatures occur at different day times. We can also observe the higher proportion of blue during the day, when we take a look in the shadow.
Photo assignments for the blue hour:
Wake up early and take two photos of a town in the blue hour. The first one before sunrise (there will be a lot less of artifical illumination in the town) the other one at sunset (In the wintertime there will be a lot of vibrant life in the city).
Try marking the spot of your first photo somehow and use a tripod to achieve the same point of view and the same section. That way the comparison lateron is much easier. Best would be if you use the same settings for your camera for both pictures (Especially the white balance!).